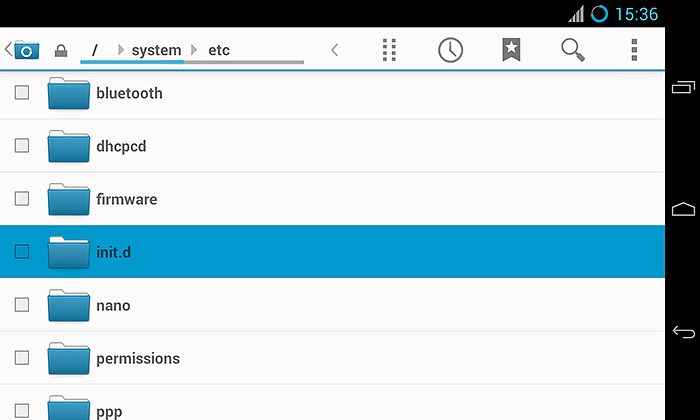
There are a lot of tweak scripts out there, but they need to place in init.d directory and you cann’t find it in your Android phone, the init.d directory is created by a Linux function named init.d script, unfortunately the stock Android system does not support it, the good thing is, you can install it manually, here is the step by step guide of how to install init.d script on Nexus 4 with stock rom.
Init.d script can run Linux commands immediately after booting up Android system, you can modify a lot of low-level values of the system, such as services star/stop. Those script files storage in the /system/etc/init.d directory, if you want to know more about it, you can check this out.
So you get some tweak scripts and they need to place in init.d directory, here is the guide lead you to created it.
1. Root permission is required, root you phone first.
2. You need to install a system model named BusyBox. Here is an BusyBox installer you can use. Just remember to enable USB debugging before you use it to install BusyBox, or the installation will fail. If you cann’t find the development options to enable USB debugging, check How to Enable Developer Options and USB Debugging in Android 4.2.
3. Download this package and flash it in Recovery, it will help you to create the init.d directory and do a test to see whether init.d script function is working. If all things going well, you should see a file named “Test.log” in /data directory.
Now you can put your scripts in the /etc/init.d/ directory, for example, the Faux kernel tweaking script which I have introduced some days before, you can run it without script manager, just put it in the /system/etc/init.d/ directory, it will run at the moment when the phone boot up, the same result as you run it in script manager.


![[APK] Camera NX 7.4 is Here, Base on Google Camera 5.2, All Features & Bring back HDR+ for Nexus2015](../../../wp-content/uploads/2016/12/Camera-NX-Google-Camera-MOD-260x150.jpg)
![[APK] Enable Portrait mode on Nexus 5X/6P & OG Pixel phone with Google Camera mod (Updated 7.3.1)](../../../wp-content/uploads/2017/12/Portrait-mode-on-Nexus-5X-with-Camera-NX-mod-260x150.png)
![[Updated] Camera NX V7.2 for Nexus 5X/6P & Pixel Base on Google Camera 5.1 from Pixel 2, Motion Photo and More](../../../wp-content/uploads/2017/10/Camera-NX-v7-260x150.jpg)