
 Subscribe to Chromloop
As the Android devices gets more and more popular, Google wants the Android platform become simplify and User-friendly, for example, the new simple and efficiency camera UI comes with Android 4.2 Jellybean, but if you are the first time using Android 4.2 and you maybe confused of the Developer options are gone, without Developer options, you can not enable USB debugging function, without USB debugging, many phone-management software can not run with your Android devices. So how to enable Developer options and USB debugging?
Here is the method you can follow:
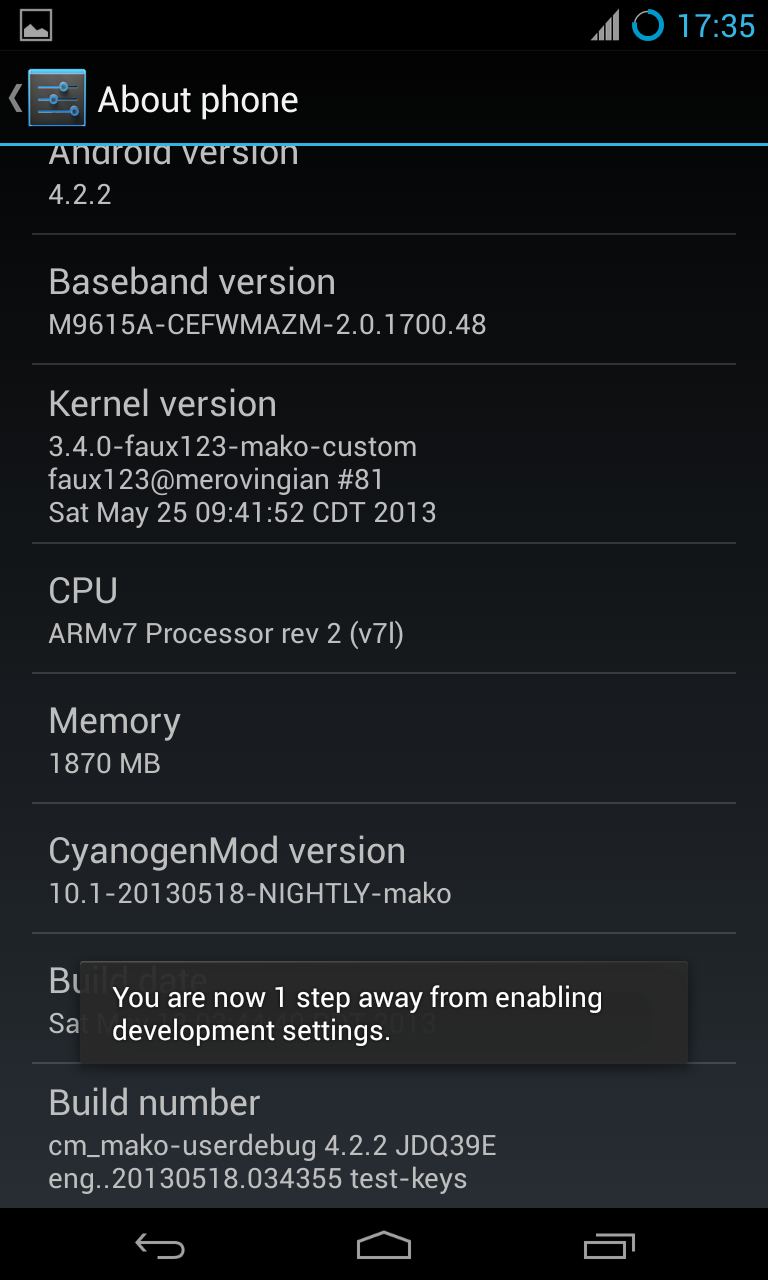
1. Go to the system settings, drag down the menu, tap on the “About phone”.
2. Go to the bottom of “About phone” page, tap on the “Build number”.
3. Keep tapping on the “Build number”, you can see a notification pops up, telling you that how many times to enable the Developer mode, you should continue until it tells you that now the Developer mode is on.
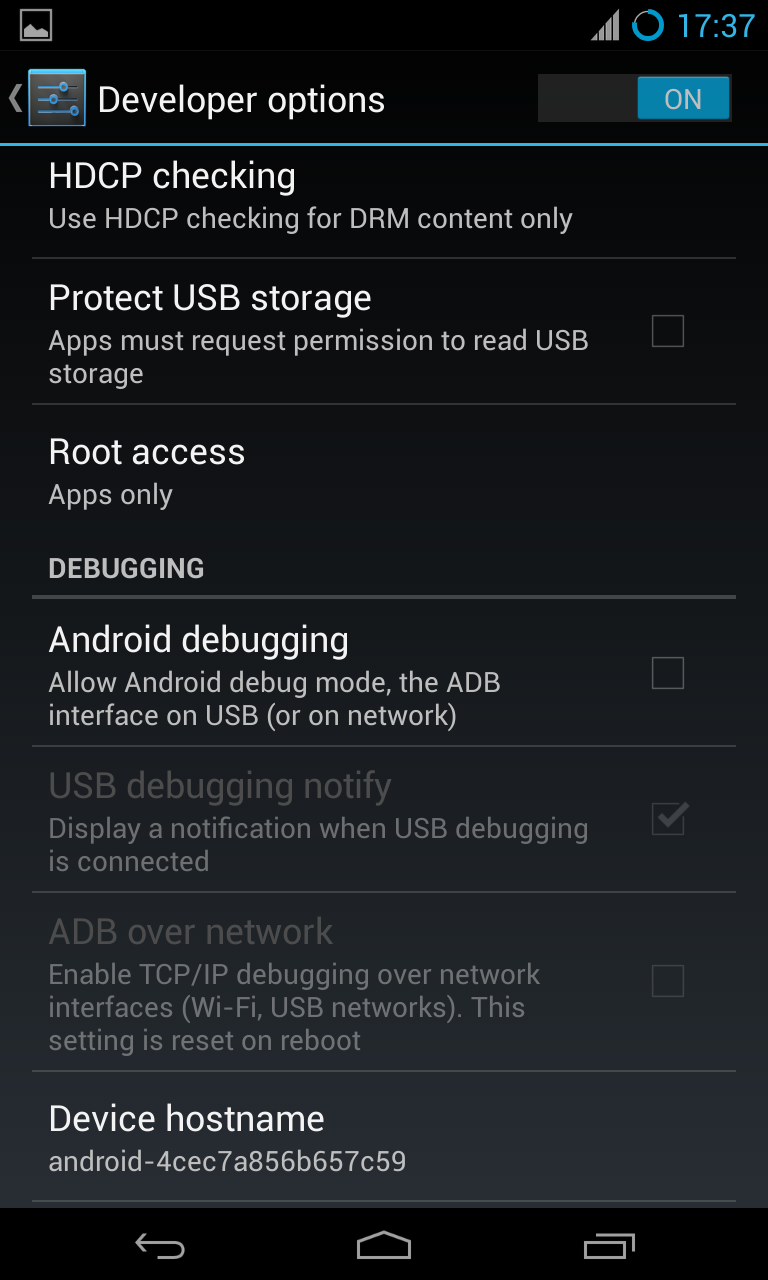
4. Go back and you will see the Developer options in the old place, the same as USB debugging options.
Here is the screenshot of Developer option enable on Google Nexus 4 .
You maybe ask how to disable the Developer mode in case some other guys can do something wrong with it? that is simple, just go to the Developer options, tap on the switch on the right corner, and you will find out the Developer options is gone.
And how to enable it again? just do the same operations in the same way.

![Google Apps Update Wednesday APK Collection [0427]](../../../wp-content/uploads/2016/04/Google-apps-update-wednesday-260x150.png)


Pingback: How to Install Init.d Script on Nexus 4 with Stock Rom - Guide - Chrom Loop()