Samsung Galaxy S II i9100 is the most powerful Android smart phone in the world in present days, so people who wanted this powerful phone to be stronger, like you, must be find out how to root the Galaxy S II, aka Samsung i9100, the operation of rooting Galaxy S II is listed below, let’s do it step by step, it’s simple and safe.
To root Samsung Galaxy S II i9100, you have to prepare four software tools at first:
1. Odin. Download and unzip it.
2. XWKDD_insecure Just download it, don’t upzip it.
3. SuperOneClick for Galaxy S II. Download and upzip it.
4. Download the Samsung Kies suite tools, we need the driver in that software, but if you already have it installed, just ignore this.
PS: Remember to enable the USB debug option in Galaxy S II i9100, it is in “Settings -> Applications -> Development”, check the “USB debugging” option is enabled.
OK, let’s begin the magic of rooting Samsung Galaxy S II.
Step1:
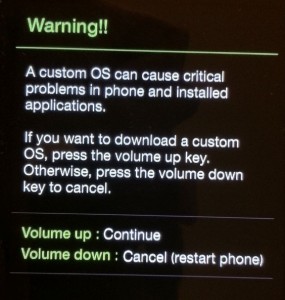
The Download Mode, you need to set your Galaxy S II to the Download Mode, the method is: switch off your Galaxy S II i9100, then holding the volume down key + home key then press the power key. you will see this warning on your phone screen.
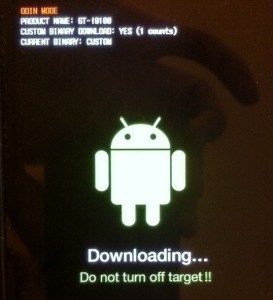
Then you press the volume up key to continue to enter the Download Mode. Like this picture:
Step2:
OK, after you success to enter the Samsung Galaxy S II i9100’s Download Mode, use the USB cable to connect the phone to your PC, then the PC will recognized the Galaxy S II, make sure all the phone drivers is installed correctly, then you can Open the Odin which you have download in last few minutes.
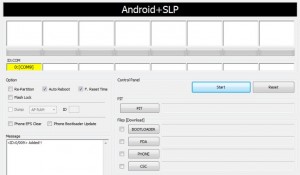
Here is the Odin3 screen shot.

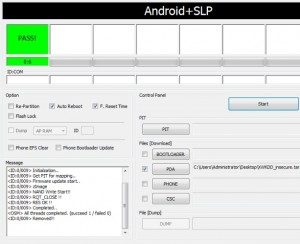
If your screen shows the same result as the information showed in the “message” window, then your phone is succeed be recognized. Now you can Click on the “PDA” button, select the file “XWKDD_insecure.tar”, Pay Attention: you check ONLY the three options in the picture below. it is the “Auto reboot”, “rest time”, “PAD”. Now click the “Start” button, the new file will send to your Galaxy S II, and it will reboot.

Step4:
OK, you are almost succeed, just one more thing. Open the SuperOneClick tools, then Click on the big “ROOT” button, some alert and advice, you can test the command “su” to check out whether your Galaxy S II i9100 is rooted, then reboot your phone.

Now you have get your Samsung Galaxy S II i9100 rooted, cheers. 🙂


![[APK] Camera NX 7.4 is Here, Base on Google Camera 5.2, All Features & Bring back HDR+ for Nexus2015](../../../wp-content/uploads/2016/12/Camera-NX-Google-Camera-MOD-260x150.jpg)
![[APK] Enable Portrait mode on Nexus 5X/6P & OG Pixel phone with Google Camera mod (Updated 7.3.1)](../../../wp-content/uploads/2017/12/Portrait-mode-on-Nexus-5X-with-Camera-NX-mod-260x150.png)
![[Updated] Camera NX V7.2 for Nexus 5X/6P & Pixel Base on Google Camera 5.1 from Pixel 2, Motion Photo and More](../../../wp-content/uploads/2017/10/Camera-NX-v7-260x150.jpg)