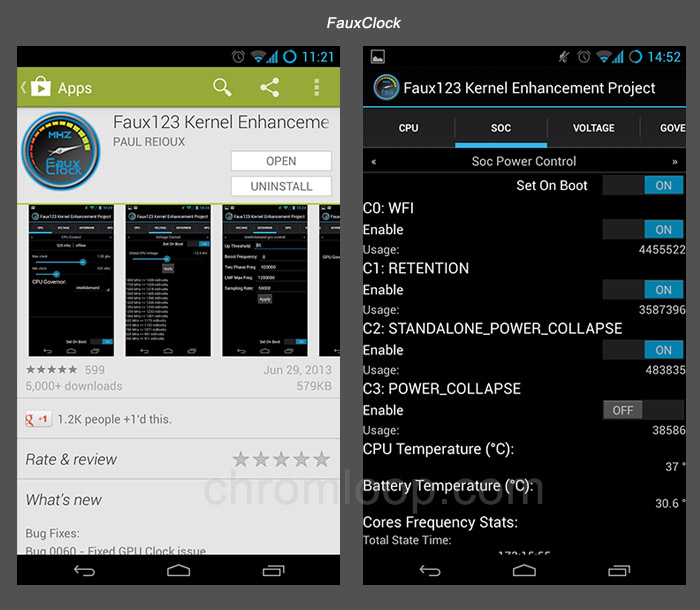
XDA fourm great developer Faux123 construed a great kernel for Google Nexus 4, it give us a balance of good performance and battery friendly. I have used this kernel with the CyanogenMod 10.1 custom rom for months. It is working great.
If you are using this kernel then you should know that the Faux kernel for Nexus 4 has many options to be customized to suitable your daily usage. For newbies, Faux123 recommend the FauxClock app. FauxClock is not free, takes $4.99, but Faux123 said everything can be setup by scripts, so if you want to try Faux kernel with your Nexus 4 use all recommended settings for test purpose, or any other reason you don’t want to use FauxClock app to control the kernel, here is some Scripts for you to setup the Faux123 kernel for Nexus 4. Remember, if you happy with this Nexus 4 custom kernel, don’t forget to thank Faux123 for spending time to do development, just buy the FauxClock to support him.

In fact, I have bought the FauxClock to verify whether this scripts are working correctly, so you just need to follow my instruction and everything will be fine. (root access needed). WARNING: all scripts only work with Faux123 kernel for Nexus 4, I won’t responsible if something be wrong on any other devices.
OK let’s begin the tutorials:
First, you need to flash the Faux123 kernel with custom Recovery. You should know that the Faux123 kernel for Nexus 4 works on all the custom roms like CM, AOSPA, etc., unless the author of custom rom told you not compatible. It also works with the stock Android 4.2.2 system.
Faux123 kernel for Nexus 4 has three versions, “tbu”, “tbm” and “m”, I recommend the “m”(mainline) version as it is not overcolocked, more stable than the overclocked versions. Here is the original theard on XDA fourm, find the latest mainline version(like 016m), Download and Flash it. I will be waiting…
OK you are back, good job. Here is the script file, download and unzip it: Faux123 Nexus 4 kernel tweak script Attention: Don’t flash it in Recovery, it is not a flashable package. just extract the fauxtweakn4 file to your phone.
Faux123 Kernel for Nexus 4 tweak script instruction:
If you read the #2 post of Faux123 kernel thread, you should see the recommend settings, and the script just making exactly the same settings:
CPU Control
Max clock: 1.512GHz; Min clock: 384 MHz; CPU Governor: Intellidemand; mpdecision: OffSOC Power Control
C0: On; C1: On; C2: OnIntellidemand gov control
Up Threshold: 75; Boost Frequency: 0; Two Phase Freq: 1134000; Sampling Rate: 50000; Optimal Freq: 1296000; Synchro Freq: 756000GPU Control
GPU Clock: 400 Mhz; GPU Vsync Toggle: onI/O Scheduler Control
I/O Scheduler (eMMC): FIOPS; Readhead Size (eMMC): 2048
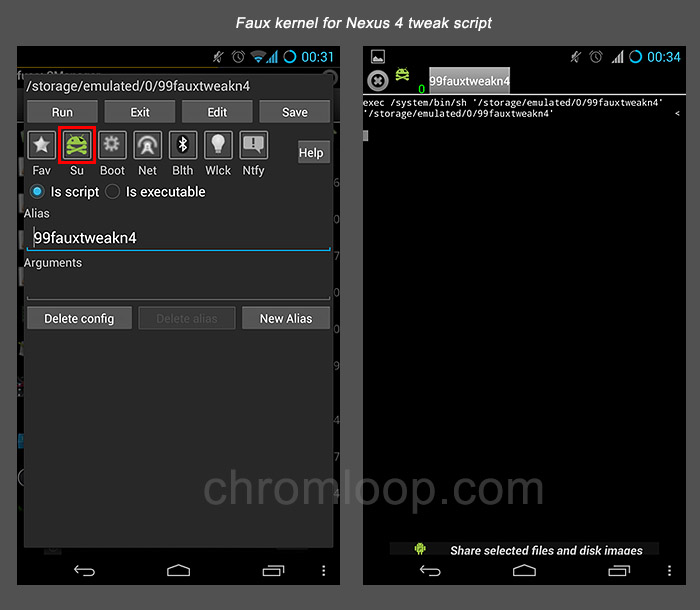
OK you got the scripts, if you want to test it right now, just use any script manager to do the job (need root), I’d like to use this Script Manger. It is simple, just located the script file “fauxtweakn4” in script manager, tap on it, enable the SU(super user) mode, then run the script. See the picture below:
If you did not see any error message, just the same results as my screenshot, everything should be done, enjoy the amazing Faux kernel on your Nexus 4.
If it did not running correctly, make sure the Faux kernel was installed, and you have enabled the super user mode.
It is not over, your phone can handle it more intellectual, without any apps. If you are asking if all things could be done automatically when you boot up your phone, the answer is yes, of course. We will talk about it in the next post soon or later. Hint: use Busybox and its init.c folder. Hint 2: all CM based rom can do it more simply.


![[APK] Camera NX 7.4 is Here, Base on Google Camera 5.2, All Features & Bring back HDR+ for Nexus2015](../../../wp-content/uploads/2016/12/Camera-NX-Google-Camera-MOD-260x150.jpg)
![[APK] Enable Portrait mode on Nexus 5X/6P & OG Pixel phone with Google Camera mod (Updated 7.3.1)](../../../wp-content/uploads/2017/12/Portrait-mode-on-Nexus-5X-with-Camera-NX-mod-260x150.png)
![[Updated] Camera NX V7.2 for Nexus 5X/6P & Pixel Base on Google Camera 5.1 from Pixel 2, Motion Photo and More](../../../wp-content/uploads/2017/10/Camera-NX-v7-260x150.jpg)